CallerOne uses a self-signed certificate. This means that, unless told otherwise, Browsers will not trust the certificate.
Certificates are created by a “signing authority”. The “root certificate” for these authorities are automatically updated by Browsers, and allow a Browser to continue to trust public site certificates (such as when you visit https://bionic.radio).
Because CallerOne is self-signed, Browsers need to install the private “root” certificate, to tell them that the site certificate is trusted.
When you first install CallerOne, it will take you through the process of creating a certificate. You then manually have to add the “root” certificate to any Browsers that you want to use with CallerOne. Details of how to do this are below.
A self signed certificate has a maximum life of 820 days. After this the certificate will no longer be trusted and will need to be recreated.
In CallerOne, the process for this is:
- Stop the CallerOne service in Windows Services
- Navigate to C:\ProgramData\Broadcast Bionics\ (note ProgramDATA not Program FILES – it may be a hidden folder)
- Rename the certificates folder to something else
- Navigate to C:\Program Files\Broadcast Bionics\Caller One\
- Right click the CertificateSetup.bat file, select “Run as Administrator” and create the certificate after filling in the details (as you did when first installing CallerOne)
- Start the CallerOne service
You will then need to install the new root certificate on any machines using CallerOne.
Open a web browser on the remote device and type in the address you use to access CallerOne. For example:
https://PCNAME:3020
(where PCNAME is the machine name of the PC that CallerOne is installed on. If you don’t know the name, you can look it up. Please see Appendix 1).
You will see a warning that “Your connection is not private”
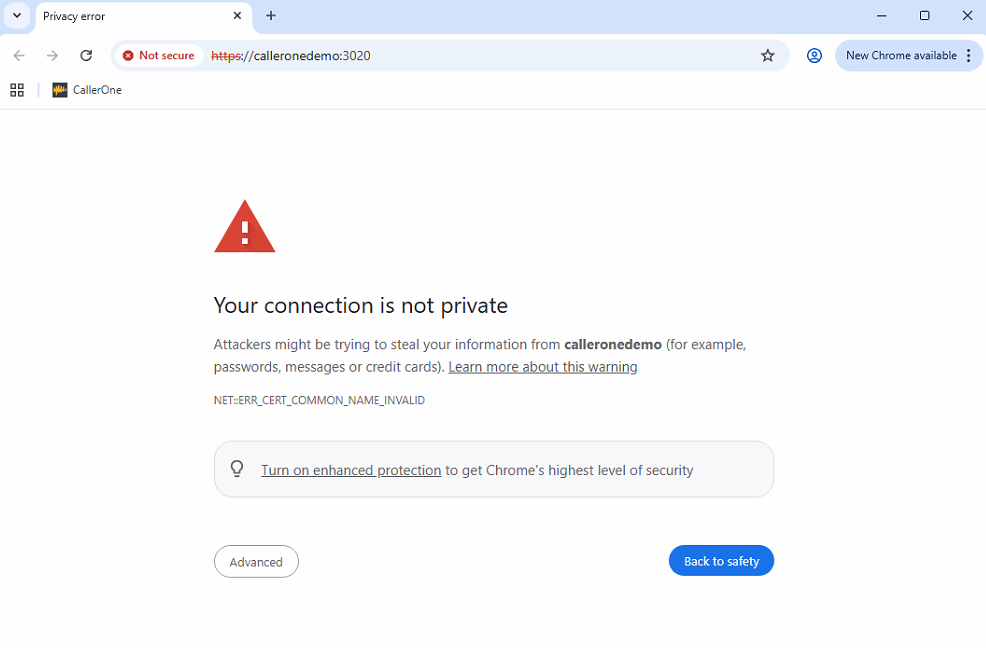
Click on “Advanced”, and then “Proceed to PCNAME (unsafe)”.
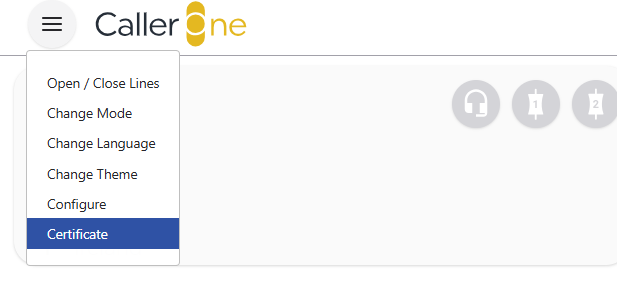
When CallerOne loads, click on the three lines as shown below and go to “Certificate”:
Click on the “this certificate” link (as seen in blue below):
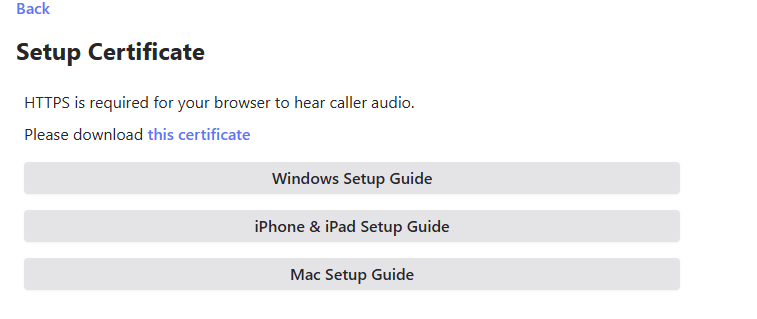
The certificate will be downloaded from the Caller One PC to your PC/Device. It will be a file called “ca.crt”.
Navigate to the folder that contains the newly downloaded ca.crt file (this is likely to be your Downloads folder).
Double click the file to open it (you will need to be logged in as an administrator to do this).
The below message will appear:
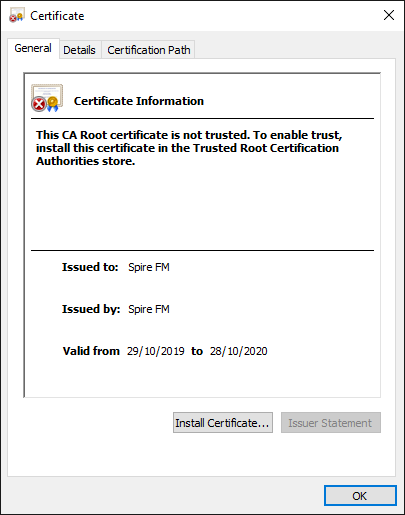
Click “Install Certificate”
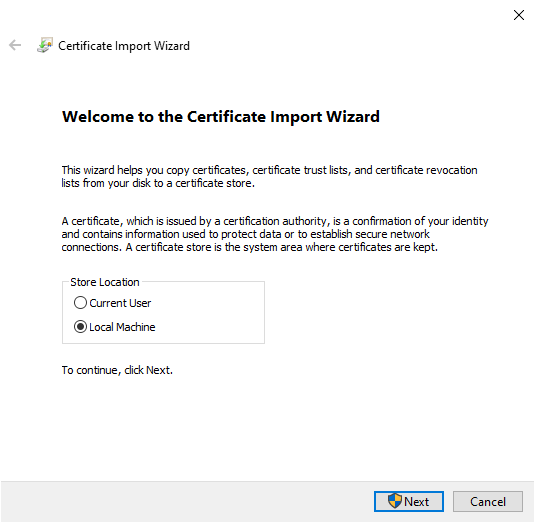
Select “Local Machine” and click “Next”.
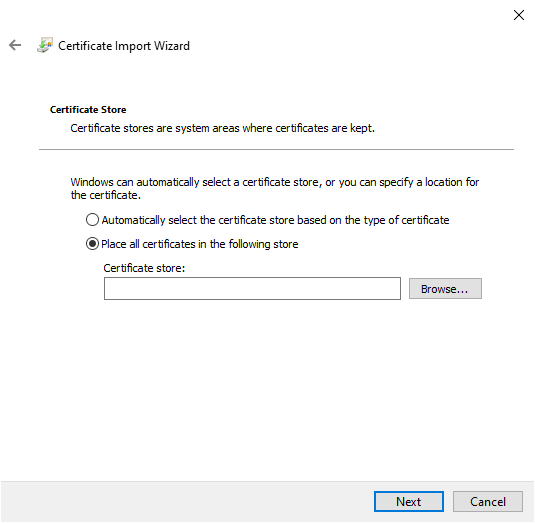
Click “Browse” to open the following window, which will allow you to select your certificate store:
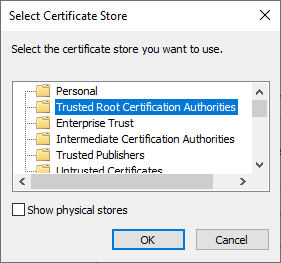
Select “Trusted Root Certification Authorities” and click “OK”.
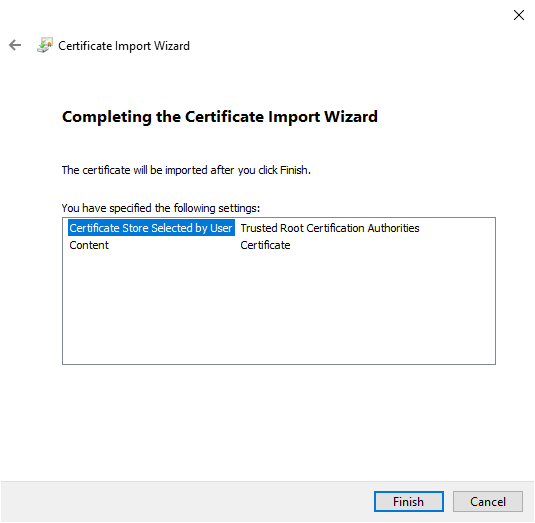
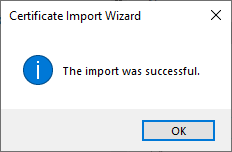
Click “Finish” and the certificate will be imported, confirmed as below.
Browse to your Caller One PC once more. You should no longer get a warning that it is “unsafe”.
Appendix 1
Looking up the PC name of the CallerOne PC.
- Press the Windows key + R to open the Run dialog.
- Type cmd and press Enter.
- In the Command Prompt window, type hostname and press Enter. Your computer’s name will appear on the screen.